Saturday 30 May 2020

Weaving a Catalan Tray

My First Catalan Tray

Recently I came across a YouTube video by Hanna Van Aelst showing how to weave a Catalan Tray.  You can watch it here.  As we had just been pruning the apple tree and had a variety of sticks as a result, I thought I'd have a go.


Prunings from the Apple Tree

First, using a long stick, make a circle or an oval by bending the stick and wrapping the thin end round the thicker part.  Be careful not to snap it.  Then add a second branch.  Start with the thick end where the thin end finished and carry on wrapping...
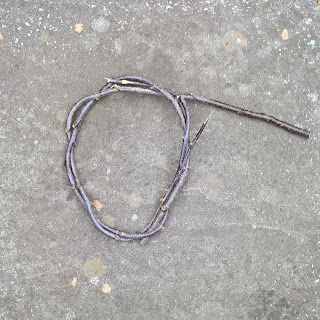

Making the circle/oval framework

Tuck the ends in if you can and then trim the ends off...

Neatened up by trimming the ends off

Choose 4 sticks that are longer than the circle.  Lay them in pairs on your circle dividing it into 3.  Try laying them in pairs with the thick end of one next to the thin end of the other...


Add the sticks that you are going to weave over

Begin weaving across your tray going under and over as you go.  Start in the middle and use your thicker sticks here.  Alternate the under and over as you go and start each row from opposite sides so that you begin by coming from under your circle/oval.  Poke the stick down from the front rather than bringing it up from behind.  To go under the pair of sticks, go round the top, rather than poking it down and then bringing it back up.  You are less likely to snap your stick this way.  Keep squeezing your weaving together so that it is quite dense.

Begin weaving from the middle

Keep going until you have filled in the circle...

Carry on weaving till you have filled the circle

As you get nearer each end of the circle, bend your long sticks in to meet each other outside the circle.  When you have filled in the circle, trim all the ends so they extend just beyond the circle.  Bind the ends of the two pairs of long sticks together.   I tried to do this with ivy but it kept breaking so I used some linen yarn...


Once you've done both ends, your tray is complete.  I enjoyed this so much I made a second one...

Catalan Tray #2


Here they are together...


Finished Catalan Trays

and then I tried making a small one.  I added a fuchsia flower to give you an idea of scale and some hope...

Small Catalan tray


I think this could be addictive.  It does use more sticks than you imagine so make sure you have a plentiful supply.  Thanks Hanna for your tuition!

Hanna has lots of other videos on YouTube if this has whetted your appetite.  She also runs online workshops and has some beautiful baskets in her shop.  Why not take a look?


Saturday 23 May 2020

reCollecting - Sylvie Franquet at the Harley Gallery

Manmade - Boys will be Boys - Sylvie Franquet 
"When looking at the Nightwatch, I saw these men dressed upto the teens, and posturing, stirring each other up into aggression.  Then, in the midst of them, I spotted the woman trying to be heard."

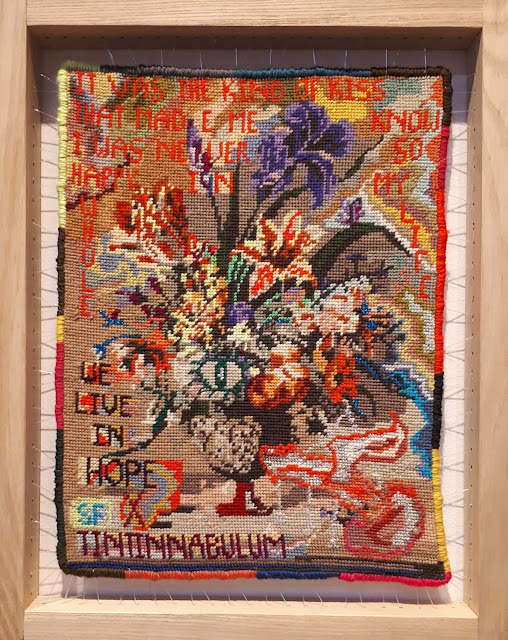
Last year I saw an exhibition by Sylvie Franquet at the Harley Gallery, which is on the Welbeck Estate near Worksop.  Sylvie Franquet is a self taught, Belgian born artist who collects her materials on her rambles, at fleamarkets and on Ebay.  She subverts famous artworks by men that have been created in tapestry, usually by women, by unpicking and reworking them to include quotes that have inspired her.  In doing so she changes the focus from the male gaze to her own.  They become both playful and political.

Hornicopia - Sylvie Franquet
"These still lives are all about nostalgia.  Our connection with nature gives us an exuberance and a hope."

Nature Morte/Still (A)life - detail - Sylvie Franquet
"This large tapestry is a patchwork of landscapes. It explores the place of woman in landscape and in nature, and her connection with it."

Rebel With A Heart - Sylvie Franquet
"A tapestry inspired by Robin Hood.  A kind of sampler  insisting on the political, personal, and playful role one can and must play in this world."

Franquet has also been inspired by the Portland Collection which is also housed at the Harley.  The Portland Collection is comprised of the objects collected by the Dukes of Portland and their families.

God Was A Woman  - Sylvie Franquet

Sylvie Franquet's driftwood sculptures and dressed stone-mother-goddesses were influenced by Margaret, 2nd Duchess of Portland's, natural history and archaeology contributions to the collection.

Cormorant (Shag) - Sylvie Franquet
 
Her work is both thought provoking and humorous.


Sunday 17 May 2020

Sue Brown at Hope & Elvis

Sue Brown

Last year I went on a Gym Arabic Transfer workshop with Sue Brown at Hope & Elvis.  Sue Brown is a printmaker from Cheltenham (famous also for driving a 2CV - which you might catch a glimpse of later in some of the pics!)  She specialises in collagraph printing which involves making a collage of design elements as a print block which she can then print from.  And her work features lots of birds!  Here are some examples of Sue's work...

Examples of Sue's Work


Examples of Sue's Work

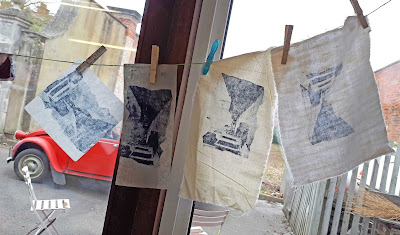
At this workshop Sue was sharing her expertise on the gum arabic transfer printing technique.  For this you need gum arabic, a wooden spoon, some laser printed images in black and white (very important) together with some papers and textiles to print on.  And some oil based printing inks.  Sue particularly likes Hawthorn inks!

Essential Tools - Gum Arabic & a Wooden Spoon

Laser copy of a photo
Lovely vintage papers to print onto

And of course, a cup of tea...


Reflecting on my first results with a cup of tea!

We printed onto lots of different papers and textiles and also did lots of mark making experiments with textured wallpaper, bubble wrap, white acrylic paint, magic foam which you can use to make your own printing blocks and different inks, wax and bleach.  See all the pics below...

That car again!

Prints drying (and a glimpse of Sue's 2CV)

My gum arabic transfers
My mark making

My booklets showing all techniques

Sue had showed us how to make some of our samples into simple booklets just by folding, cutting and gluing.  And here are some examples of everyone's booklets showing a combination of all the techniques we tried out...

Everyone's work

It was a great workshop - thanks, Sue!

Hope & Elvis, which is on the Welbeck Estate near Worksop, is a great place to go for a workshop.  There are great tutors, loads of materials to use, a friendly atmosphere (thanks to Louise Asher, who owns Hope & Elvis) and fabulous lunches provided by Magie Hollingworth (which are a highlight in themselves!) Check them out!


Monday 11 May 2020

Dyeing with Dandelions

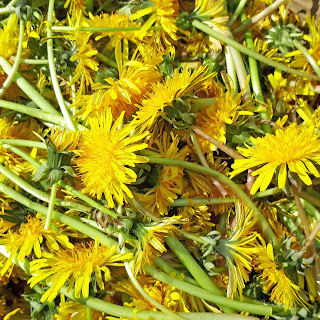
Dandelions au naturel

Having had some success with my rhubarb leaf dyeing, I decided to have a go with dandelions as there seemed to be acres of them about.  I set about picking all the dandelions in our allotment and some from the neighbouring allotment - with permission of course - thanks, Alison!

Collecting dandelions at the allotment

Here's what they looked like after picking...

Dandelions after picking

and the next day when I'd pulled just the heads off and put them in the dye pan...

Dandelions in the pan

I had a little more weight in dandelion heads than in fabric but not a lot and certainly not twice the weight of fabric in dandelion heads.

The fabrics I chose to dye were some wool yarn, wool blanket and cotton calico.  They were soaked overnight in soy milk which I had read acted as a mordant for cotton fibres.  A mordant is a dye fixative.  It helps bind the dye to a fabric to make it more colourfast and can affect the resulting colour.  For example, mordants may intensify the dye colour.  Alum was recommended as a mordant for wool but I didn't have any of that so I soaked them all in the soy milk (1 part soy milk to 4 parts water).  I could only get light soy milk.  I don't think this worked as well as ordinary soy milk would have.  Also, I didn't dry the fabric before putting it in the dye bath. I just wrung it out tightly.

Fabrics to dye

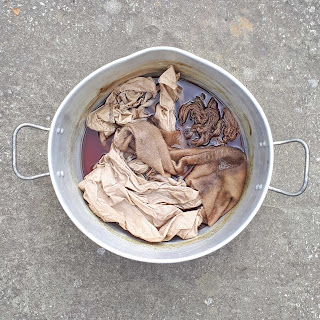
To make the dye bath, I covered the dandelions with water and simmered them for an hour and then removed the plant matter by straining.  The remaining liquid formed the dye bath to which I added the wrung out fabric.  My pan was aluminium as this was all I had. Ideally you would use a non reactive pan made out of stainless steel.   I simmered the dye bath for about an hour, during which I added a few rusty nails as nothing much seemed to be happening.  I thought this might help as you can use iron as a mordant too.  However, the recipe for an iron based mordant involves soaking some iron objects in 2 parts water to one part vinegar solution for a couple of weeks until it goes a rusty orange colour.  Dropping a few nails in the dye bath late on in the process was therefore unlikely to have a great effect.

Dyebath in action

I left the dye bath to cool overnight...

After cooling overnight

The following day I rinsed out the materials, washed them and hung them up to dry.  Here are the results together with a little sample of the original fabric to show the colour change...

Before and after

I was expecting a pale yellow colour but got a beige colour on the calico and a deeper more yellowy beige on the blanket and yarn.  There were some darker, discoloured patches where the materials had come into direct contact with the nails.

Results of dandelion dyeing

It was quite an interesting result and I don't know if I overheated the dyebath which resulted in a more neutral colour than expected. I would also probably have got a better result if I'd been more careful with the mordanting process and used more dandelion heads.
 
Some helpful websites for natural dyeing and mordants include House Sparrow Fine Nesting's blog on How to Dye with Dandelions, Natural Dyes from Your Flower Garden from Fix.com. and Fiber Artsy & Craftsy's Iron Mordant recipe.


Saturday 2 May 2020

Big Knitting Creates a Rainbow

Big Knitted Rainbow and Little Knitted Rainbows

I recently knitted some little rainbows, that are currently hanging in my window but which will be heading along to the Rainbows for Rowntree Park yarnstorming project in due course. Offering a visible thank you to the NHS, they were also fun to make, look very cute and definitely contibute a positive vibe which is much needed at the moment.  So, what next? I decided I'd like to make a big knitted rainbow.  My big knitting needles are 20mm in diameter so need some big yarn.  I save colourful old T shirts in case I might be able to recycle them for a craft project and here they came into their own!  I didn't think I'd have a rainbow's worth of colours but it turned out I did...

A Rainbow's Worth of Old T Shirts

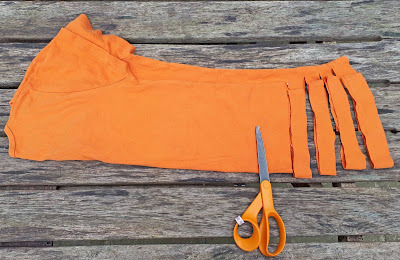
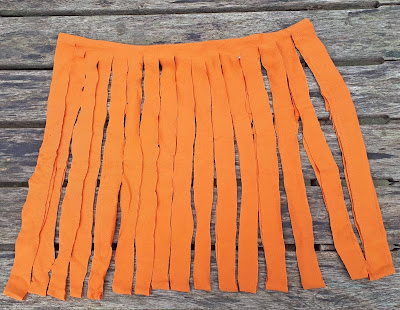
So I got to work preparing some upcycled T-shirt yarn.  You fold your T shirt not quite in half lengthways and cut strips not quite to the edge. Then unfold and at the edge where it isn't cut through make a series of diagonal cuts to produce a continuous piece of yarn. You can use the sleeves as well.  I cut my strips about 1 inch/2.5cm wide.

Fold T shirt Over and Cut Strips

Unfold T shirt to Reveal Cut Strips

You can find a great YouTube video from Sustain my Craft Habit showing you exactly how here.  All my adult T-shirts produced over 20m of yarn each...

Big Needles and T-shirt Yarn

I cut up 2 red T-shirts in different shades of red as I knew I would need more than one T-shirt's worth of yarn for the red section of my rainbow. Next I started knitting...

Casting On With The Big Needles

The pattern I used was from Knitting by Post and was the Easy Medium Sized Knitted Rainbow knitting pattern.  I only knitted with half the number of stitches as my rainbow wasn't going to be double sided. Here it is knitted up...

Big Knitted Rainbow

Next I attached it to some plastic fencing using some of the T shirt yarn and some clear fishing line.  Then I made a whole load of cloud coloured pompoms in different sizes...
 
A Suitcase Full of Pompom Clouds
 

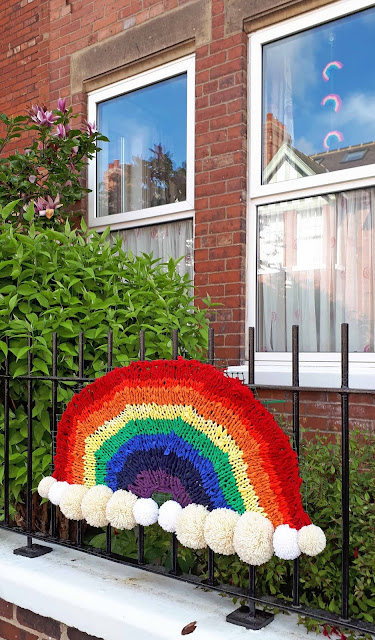
and attached them to the bottom of my rainbow.  The finished item was up on my railings in time to "Clap for our Carers" where we show our appreciation with some hearty applause for the NHS and all the key workers keeping things going during the pandemic.

Finished Big Knitted Rainbow

My big knitted rainbow is about 1 metre wide and 0.5 metre high.  I don't think you'll miss it if you're passing by!  Why not hunt out your old T shirts and have a go?